Payments
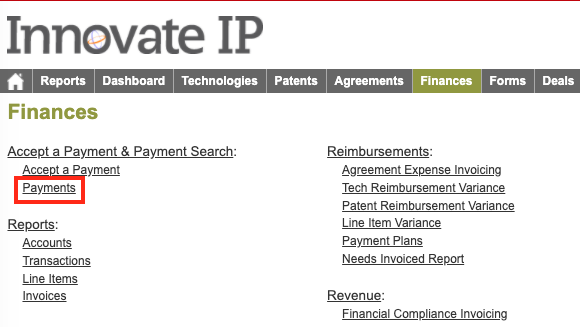
Payments record all monies received from external entities in the form of checks/money orders, electronic transfers, credit cards, and transfers within the University. Payments can be searched and views from the Payment Search Page accessed via the Finances tab in the menu bar

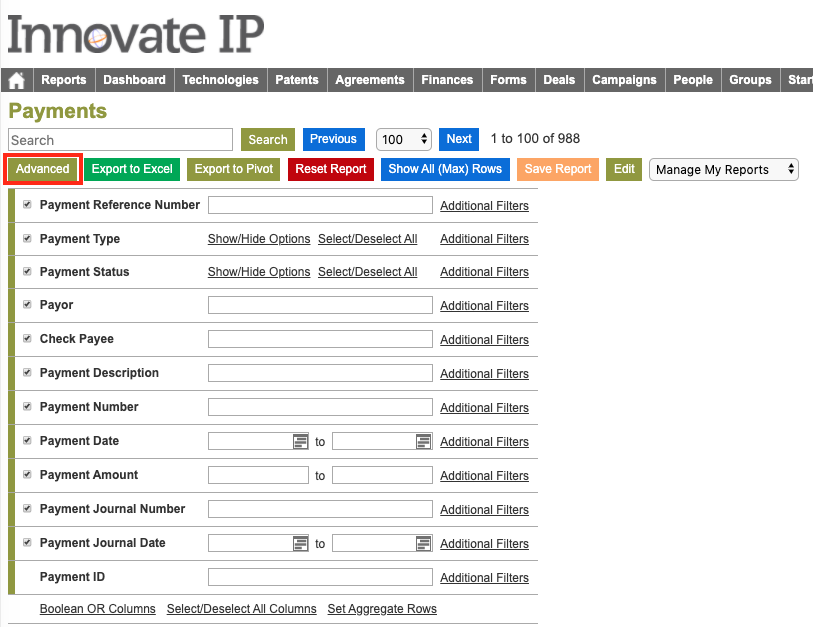
There are a variety of search terms that can be used to filter Payments by criteria. Search terms are accessed by selecting the “Advanced” button on the Payments Search Page.

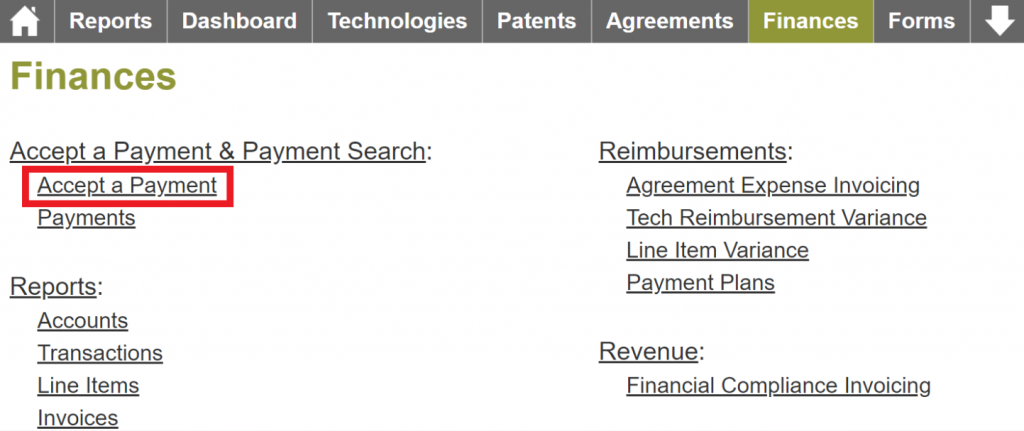
Payments can be accepted using the Accept Payment Module which can be accessed from an invoice, agreement, or the Finance Menu. Clicking on the “Accept Payment” link located in the header of the invoice or agreement or under the “Accept Payment & Payment Search” header on the Finance page will open the Accept Payment Module.


*It is recommended to periodically review the payments in a draft status and to ensure that all payments are posted in a timely manner or removed from the system for accurate reporting.
Accept a Payment

Start
Enter all of the information from the payment on the start page. Multiple payments should not be combined into one entry to maintain data integrity.
- Payor The group that sent the payment. The payor must have a group record to be captured in this field (see Groups for more information). It is possible to have more than one group with the same name, so be sure that the selected group id matches the group id on the agreement. If it is unnecessary for more than one group record to exist, they can be merged. At times, a payment may be received from a group other than the group listed on the agreement. This will be accepted into the system, however, an error message will appear.
- Pay to the Order of The group that is being paid. In most cases this will be the same as the owning organization(s).
- Payment Amount The amount of the payment being received
- Payment Number The reference number of the payment (check number, bank reference number, etc.)
- Payment Type The type of payment (check, ach/wire, cash, credit card, etc.)
- Payment Date The date of the payment (check Date, transfer date, etc.)
- Journal Number The reference number associated with the posted payment, most likely the number from the general ledger.
- Journal Date The date the payment was posted
- Description A summary of describing why the payment was made
Reimbursement
Click on Reimbursement or Next from the start page to accept a payment for the reimbursement of expenses that appear on an invoice for on-going expenses.
Selecting Reimbursement Invoices
- Add Reimbursement Invoice Opens a window that allows for searching on multiple criteria
- Agreement Number The agreement number associated with the invoice
- Invoice Amount
- Invoiced Group The group that is associated with the invoice via the agreement record
- Status Draft, Open, Paid, Partially Paid Off, Void, Written Off
- Invoice Number

Check the boxes to the left of the row to add an invoice or all can be selected by checking the box next to “Agreement Number”. Selected invoices are added to the reimbursement page by clicking on “Add Invoice” in the bottom right corner. The “Selected Amount” is a sum of the “Balance Due” column and will be updated when the boxes next to the row are checked or unchecked.

If a selected invoice needs to be removed, click on the x on the right side of the row

Applying the Payment to Reimbursement Invoices
- Agreement Hyperlink that opens the agreement record in a new window
- Invoice Number Hyperlink that opens the invoice in a new window
- Line Item Type Drop-down list to categorize the payment within the account. If there is one line item on the invoice, this will be filled in using the data from the invoice.
- Description User added text to include additional information about the payment being received. If there is one line item on the invoice, this will be filled in using the data from the invoice.
- Chart of Accounts General ledger account where the payment is posted
- Invoice Amount Original amount of the invoice
- Balance Due Amount that is owed on the invoice
- Auto Apply Fills in the Amount to Apply box with the balance due amount, regardless of the payment amount
- Amount to Apply Amount being applied to the invoice to reduce or eliminate the balance due
- Amount Remaining Amount available to apply to the items

- Original Line Item Line item reference number, clicking on the link opens the line item detail page in a new window
- Original External Invoice Number Invoice number for the item being reimbursed, typically a law firm invoice number
- Original External Invoice Date Date of the invoice for the item being reimbursed
- Date of Work Date that the work was completed for the item being reimbursed
- Technology Technology reference number that is related to the item being reimbursed
- Patent Patent reference number that is related to the item being reimbursed
- Account Location of the reimbursement payment when the payment is finalized. If an account already exists for the agreement-technology/patent combination, it will be displayed. If there is not an account, click on the drop-down to create a new account.
- Invoiced Amount Original amount of the item that is being reimbursed
- Balance Due Amount remaining to be paid for the item
- Apply to Line Items Clicking on this will fill in the boxes in the column below based on the balance due in the order of the rows based, negative values will be entered first.
Reimbursement – Payment Plan and Reimbursement – Prepayment (Temporary process)
Invoices of these types must first be modified in order to accept payments for them. Assuming that these invoices were created as a result of a financial compliance item, complete the steps below:
- Change the open invoice type to “Revenue – Financial Compliance” and click “Make Edits”
- From the accept payment page, click on Revenue in the status bar and select the reimbursement invoice that was updated in step 1 in the revenue invoice search window
- Enter the information in the first row, choose any chart of accounts (this is just a temporary step)
- In the second row click the radio button on the left and then create or select a revenue account for the payment to be deposited into. If the payment should only be associated with the Agreement, just select the agreement reference number. If it is known which technology or patent the payment should be credited to, click on the radio button next to that record. The payment can also be split among any of the technologies or patents listed.
- Finish the payment
- Locate the created line items in the revenue account using the line items search page or through the agreement by searching on the invoice number
- Change the chart of accounts to be the correct code
- Move the line item from the revenue account to the correct reimbursement account. If the row you want to move is the only item in the account, you can change the account type in the header from revenue to the proper reimbursement account type.
- Inform the user in office with Innovate administrative level security access with a link to the invoice to change the invoice back to its original type from “Revenue – Financial Compliance”. If the office administrator is not available, email the Innovate team to update the invoice type.


Revenue
Click on Revenue or Next from the Reimbursement page to accept a payment for financial compliance items that appear on an invoice.
SELECTING Revenue INVOICES
- Add Revenue Invoice Opens a window that allows for searching on multiple criteria
- Agreement Number The agreement number associated with the invoice
- Invoice Amount
- Invoiced Group The group that is associated with the invoice via the agreement record
- Invoice Status Draft, Open, Paid, Partially Paid Off, Void, Written Off
- Invoice Number

Check the boxes to the left of the row to add an invoice or all can be selected by checking the box next to “Agreement Number”. Selected invoices are added to the reimbursement page by clicking on “Add Invoice” in the bottom right corner. The “Selected Amount” is a sum of the “Balance Due” column and will be updated when the boxes next to the row are checked or unchecked.

If a selected invoice needs to be removed, click on the x on the right side of the row
APPLYING THE PAYMENT TO Revenue INVOICES

- Agreement Hyperlink that opens the agreement record in a new window
Invoice Number Hyperlink that opens the invoice in a new window - Line Item Type Drop-down list to categorize the payment within the account. If there is one line item on the invoice, this will be filled in using the data from the invoice.
- Description Text with additional information about the payment being received. If there is one line item on the invoice, this will be filled in using the data from the invoice.
- Chart of Accounts General ledger account where the payment is posted
- Invoice Amount Original amount of the invoice
- Balance Due Amount that is owed on the invoice
- Amount to Apply Amount being applied to the invoice to reduce or eliminate the balance due
- Amount Remaining Amount available to apply to the invoiced items
Allocation Schedule
If the agreement has one or more allocation schedules, they will be displayed with the allocation schedule reference number, the effective dates, and notes. The allocation schedule is located in the agreement by clicking on Related Items in the green ribbon.
- Technology If the revenue being received is to be related to the technology, click the radio button next to this field
- Patent If the revenue being received is to be related to the patent, click the radio button next to this field. This is not common.
- Account Drop-down that shows all accounts that are linked to the agreement and the selected patent or technology
- Allocation Percent The percentage of revenue that is to be related to the technology or patent
- Apply to Line Items Fills in the boxes in the column below using the amount in the field above and multiplying it by the allocation percent

No Allocation Schedule
If an allocation schedule does not exist in the agreement, the payment can be allocated to any of the directly licensed technologies or patents or the indirectly related technology related to the licensed patent.
If there are no licensed technologies or patents, the payment will be posted to the agreement revenue account that is not related to a technology or patent.
Non-Invoiced Revenue Items
Click on Non-Invoiced or Next from the Revenue page to accept a payment that is not associated with an invoice.
Selecting Agreements
All payments must be linked to a compliance item within and agreement record. Click on Add Agreement to properly associate the payment with an agreement.
Add Agreement Opens a window to search for the agreement to which the payment should be associated. Once the agreement is located, click Add Agreements to return to the previous page

- Agreement Number
- Type Agreement Type
- Status Agreement status

- Agreement
- Compliance Item All financial compliance items have reference numbers that can be linked to the payment. Any financial compliance items that are active or past due will appear in the list to select.
- Line Item Type Subcategory within the account
- Description Text box to add additional information about the payment being received
- Chart of Accounts General ledger account where the payment is posted
- Amount to Apply Amount being associated with the agreement
- Amount Remaining Amount remaining to apply after allocated

Allocation Schedule
If the agreement has one or more allocation schedule, they will be displayed with the allocation schedule reference number, the effective dates, and notes. The allocation schedule is located in the agreement by clicking on Related Items in the green ribbon.
- Technology If the revenue being received is to be related to the technology, click the radio button next to this field
- Patent If the revenue being received is to be related to the patent, click the radio button next to this field
- Account Drop-down that shows all accounts that are linked to the agreement and the selected patent or technology
- Allocation Percent The percentage of revenue that is to be related to the technology or patent
- Apply to Line Items Fills in the boxes in the column below using the amount in the field above and multiplying it by the allocation percent
No Allocation Schedule
If an allocation schedule does not exist in the agreement, the payment can be allocated to any of the directly licensed technologies or patents or the indirectly related technology related to the licensed patent.
If there are no licensed technologies or patents, the payment will be posted to the agreement revenue account that is not related to a technology or patent.
Summary
The summary page provides a detailed, read-only view of the payment that is being received.
Errors will be presented with a pop-up window stating that there are errors that need to be fixed and red text for the page(s) with the error. If any edits need to be made, return to the page where the error exists to make the correction.

Payments can be saved as a draft at any point and returned to later via the payments search page.
“Finish” will save the payment, mark it “Completed”, and the line items will be created in their respective accounts. Upon finalizing a payment, invoices will also be updated with a status of paid if the payments on the invoice equal the invoice amount.

Delete a Payment
If you ever need to delete a payment after it has been accepted, access the payment and select the Delete button on the right-hand side of the accepted payment record (see Delete a Payment).
Over-payments
Over-payment of invoices should be posted as separate entries. As an example, if an invoice is sent to a licensee for $10,000 and they send a payment that exceeds that amount, apply $10,000 to the invoice and then enter the overage as a non-invoice payment.
Refunds
Innovate does not yet allow payments to be posted to accounts that are not reimbursement or revenue. Therefore, you will need to add a manual line item to the expense account as a negative number. This will cause the general ledger and Innovate to be out of balance. This feature is currently in development for release in an upcoming version.
